Guide: How to connect Tuya to ConnectedRoom



In order for ConnectedRoom to be able to communicate with your Tuya devices, you will need to create a Tuya Developers account.
Create an account

Once you have a Tuya Developer account, you can follow the next steps:
Log in to your Tuya Developer account
In the left navigation bar, select Cloud > Development.
On the page that appears, select Create Cloud Project.
Select Create to continue with the project configuration.
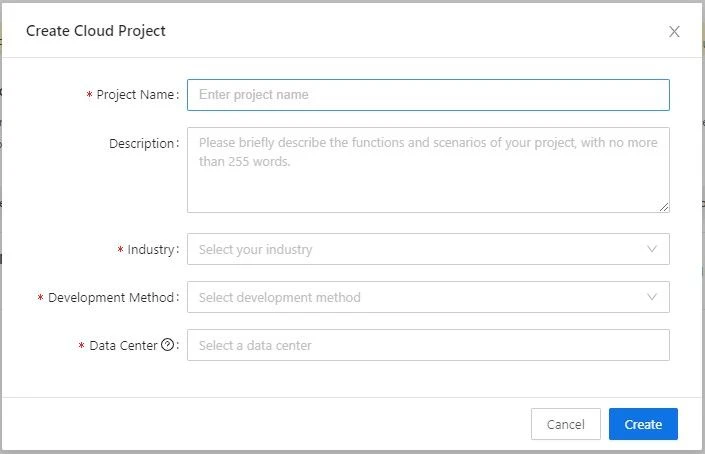
In the Create Cloud Project dialog box, configure Project Name, Description, Industry, and Data Center.
For the Development Method field, select Smart Home from the dropdown list.
For the Data Center field, select the zone you are located in.
Refer to the country/data center mapping list here to choose the right data center for the country you are in
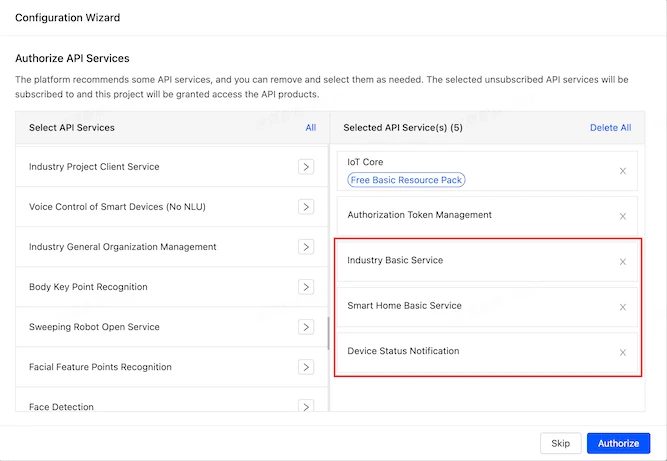
In the Configuration Wizard, make sure you add the following APIs. The list of APIs should look like this:
IoT Core
Authorization Token Management
Industry Basic Service
Smart Home Basic Service

Now that your project is created, you need to add your Tuya account to the project. To do so, follow the steps below:
In Cloud > Development, open the project that was just created using the link on the far right of the list.
Navigate to the Devices tab.
Select Link App Account > Add App Account.
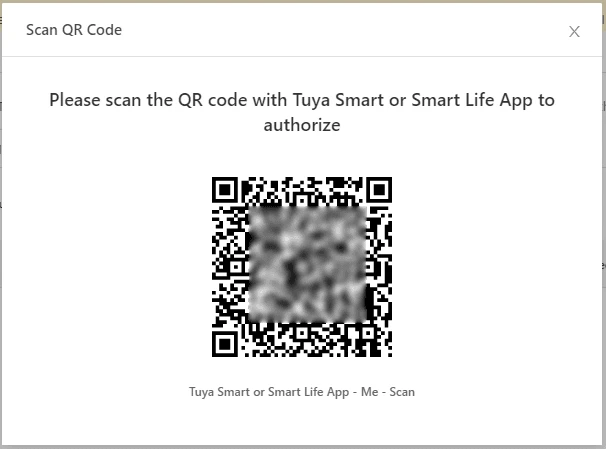
Scan the QR code that appears using the Tuya Smart app or Smart Life app using the ‘Me’ section of the app.
Select Confirm in the app.

To confirm that everything worked, navigate to the All Devices tab.
Here you should be able to find the devices from the app.
If zero devices are imported, try changing the DataCenter and check the account used is the “Home Owner”. You can change DataCenter by clicking the Cloud icon on the left menu, then clicking the Edit link in the Operation column for your newly created project. You can change DataCenter in the popup window.
Now, it's time to connect ConnectedRoom to your Tuya project:
Select the created project to enter the Project Overview page and get the Authorization Key. You will need these for setting up the integration. in the next step.
Copy Access ID/Client ID to the Tuya IoT Client ID field
Copy Access Secret/Client Secret to the Tuya IoT Client Secret field
For Account, open the project, go to the Devices Tab > Link App Account
Copy the UID column into the Account field